Samsung had announced earlier this tear, that the Samsung Galaxy S2 and the Galaxy Note, would receive the official bump-up to Android 4.0 or Ice Cream Sandwich. While that may sound reassuring, the active developer community for the Galaxy S2, has already swung into action, developing custom ROMs based on the AOSP source for Ice Cream Sandwich. A few official firmwares also happened to leak out, adding to the excitement.
If you own a Galaxy S2, and haven’t had a taste of Ice Cream Sandwich yet, this handy guide should help you upgrade your device from the Gingerbread 2.3.x it is probably running, to Android 4.0 or Ice Cream Sandwich.
Note
- Make sure all your personal data has been backed up
- Make sure your battery is fully charged
Requirements
- Download the latest Leaked ICS firmware for Galaxy S2 (XXLPH) here.
- Samsung USB drivers. 32 bit Windows | 64 bit Windows
Installation Steps
- Download the latest leaked Ice Cream Sandwich firmware XXLPH to your PC, and extract the ‘I9100XXLPH.zip’ file to your desktop.
- The extracted I9100XXLPH folder should contain the following files:
- GT-I9100-MULTI-CSC-OXALPH.tar.md5
- I9100_APBOOT_I9100XXLPH_CL118559_REV02_user_low_ship.tar.md5
- I9100_CODE_I9100XXLPH_CL118559_REV02_user_low_ship.tar.md5
- MODEM_I9100XXLPH_REV_02_CL1104396.tar.md5
- Odin3_v1.85.zip
- Now power off your Galaxy S2, and reboot to Download mode. To boot into Download mode or Odin mode- press and hold the Volume Down + Power +Home buttons together. You’ll get a ‘Warning!‘ screen.. press Volume up to continue to enter download mode
- Now navigate to the i9100XXLPH folder on your desktop, and launch Odin by double-clicking the Odin 3 v1.85.exe file ( You need to extract the Odin3 v1.85 zip file)
- Connect your SGS2 to the PC via USB cable
- You should see the text “Added!! appearing in the Odin message box to the bottom left of the main program window. You should also see the COM port box at the extreme left turn yellow. This means that Odin has detected your SGS2.
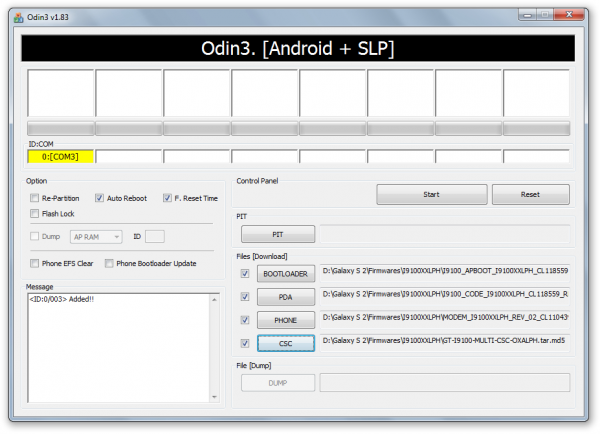
- Now make the following selections in Odin. Pay special attention to make sure that the selections are exactly as mentioned below
- Important! On Odin, make sure Auto Reboot and F. Reset Time boxes are checked. Leave everything else as default.
- Once your selections are complete, the Odin window should look like this, before you start flashing the firmware
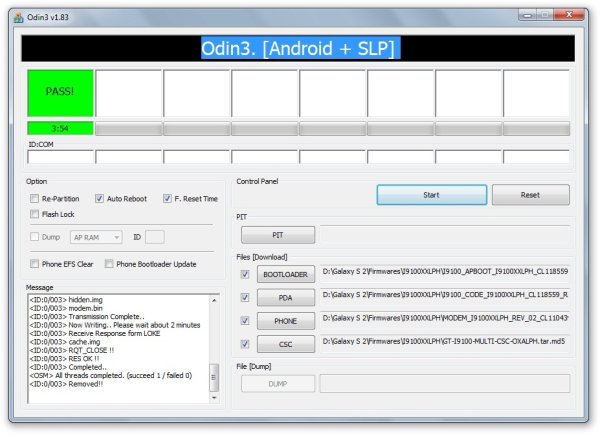
- Now click the Start button in Odin to start flashing the XXLPH firmware onto your SGS2. As the firmware is getting flashed, you should see the progress bar above the com port box move. Once Odin has finished flashing the firmware to your device, the progress box should indicate the text PASS! with a green background. Check screen below.
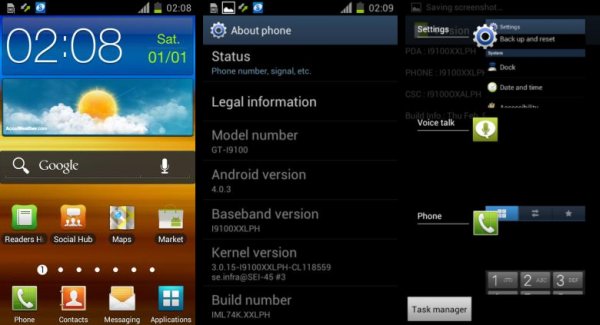
- Once your Galaxy S2 has rebooted, you should be running Android 4.0.3 Ice Cream Sandwich. proceed to set up your phone, and enjoy the latest XXLPH firmware on your Galaxy S2.
Go ahead and try this guide out, to experience Android 4.0 Ice Cream Sandwich on your Galaxy S2. Should you run into any issues while flashing the new firmware, feel free to give us a shout in comments below, and we’ll try our best to help you out. And keep watching this space for more handy Android guides.
